
Overview > Add Building
This article describes how to add a new building to your account. Adding the building is the first step in creating the baseline energy model.
Adding a building will allow you to then track its overall performance in the portfolio, prioritize it for further refinement and then implement FIMs, Designs and Projects.
Adding a Building
- From the Overview page, click the Add Building button to begin the process of adding a building to your account.

Defining a new Building
Details
- Enter a Building Name. Using the building’s address as its name is also common.
- Select the Ownership account so that the building is added into the correct portfolio. This should typically be the building owner’s account or the internal portfolio name.
- Select an existing Building Category or create a new category. This can represent the different building types in an account e.g. Offices, Hospitals, Data Centers, etc.
- The last entry on the page is the Address field. Simply enter the address of your building and the map will reposition and display the location.
- Click Continue to proceed to the next screen.

Description
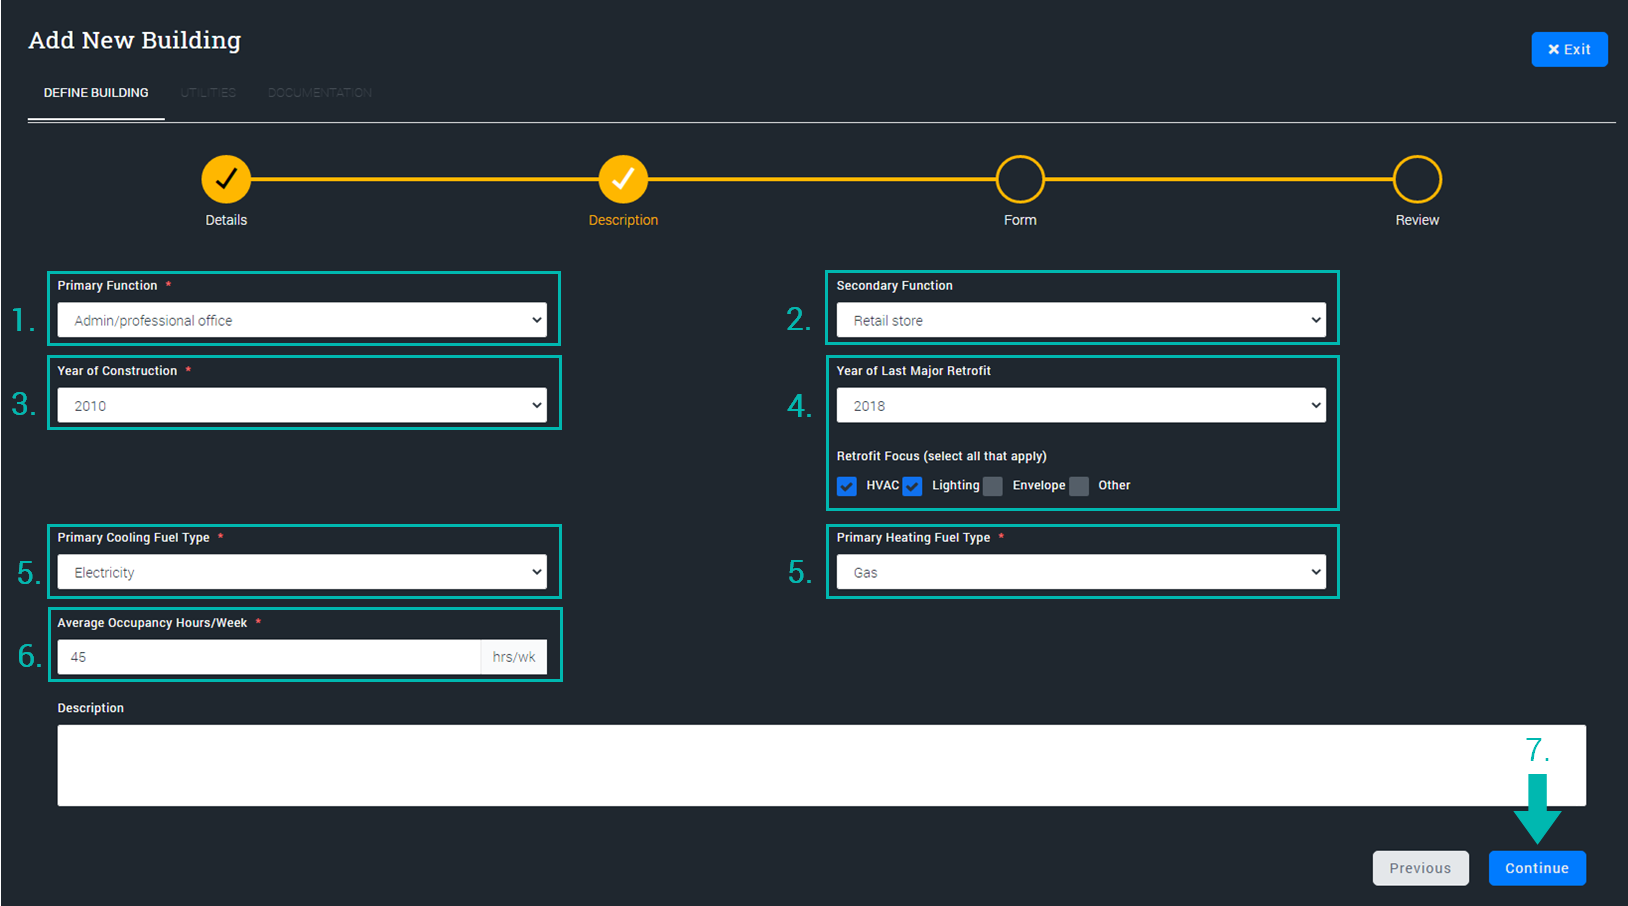
- In the Description screen, assign the Primary Function of the building. This would be the space function with the highest floor area of the building.
- A Secondary Function can also be added but is not required.
- Select the building's Year of Construction. If unknown, select an approximate year. In some cases referring to the building’s construction drawings can assist in determining the construction year.
- Also include the Year of Last Major Retrofits were conducted (if known) e.g. facade upgrades, chiller replacement, etc.
- The Primary Cooling Fuel Type and Primary Heating Fuel Type indicate the fuel source of the central cooling and heating plants respectively. The options are:
Electricity: Electrical cooling/heating equipment e.g. Water/Air-cooled chillers, Electric boilers, Rooftop units with DX coils
Gas: Natural gas powers the cooling or heating equipment e.g. Absorption chillers or Natural gas boilers respectively
District: District Cooling (Chilled Water) or District Heating (Hot water or Steam)
None: If there are no heating or cooling systems present in the building. - Enter the average occupancy hours per week for the building.
- Click Continue to proceed to the next screen.
Form
- The Form page is used to build the building’s approximate geometry. The Building Shape can be selected from a prescribed list of shapes or defined on the mini-map by selecting the edges of the building outline. Further detail is provided in the following sections.
- Enter basic attributes like the number of floors, the floor area (this value represents a single level’s area), individual floor heights and lastly the window-to-wall ratio (which represents the area of the windows to opaque wall area expressed as a percentage).
- Click Continue to proceed to the final screen.

Block Shapes
- From the Building Shape dropdown, select from a range of predetermined building shapes that include Block/Square, Plus, “H”, “L”, “T” and “U”.

- Specify the number of levels in the floor field.
- Enter the floor area. If there are different floor footprints in the building then use the Add floor definition tool.
Pro Tip: Change the fixed block shapes by clicking on the Customise Edges button and drag the surfaces until the desired shape is achieved.
Define Using Map
- Select the Define Using Map option in the Building Shape dropdown.
- Align or zoom the map so that the building outline is clearly visible and easy to work with. Click on the Polygon Tool button on the map.
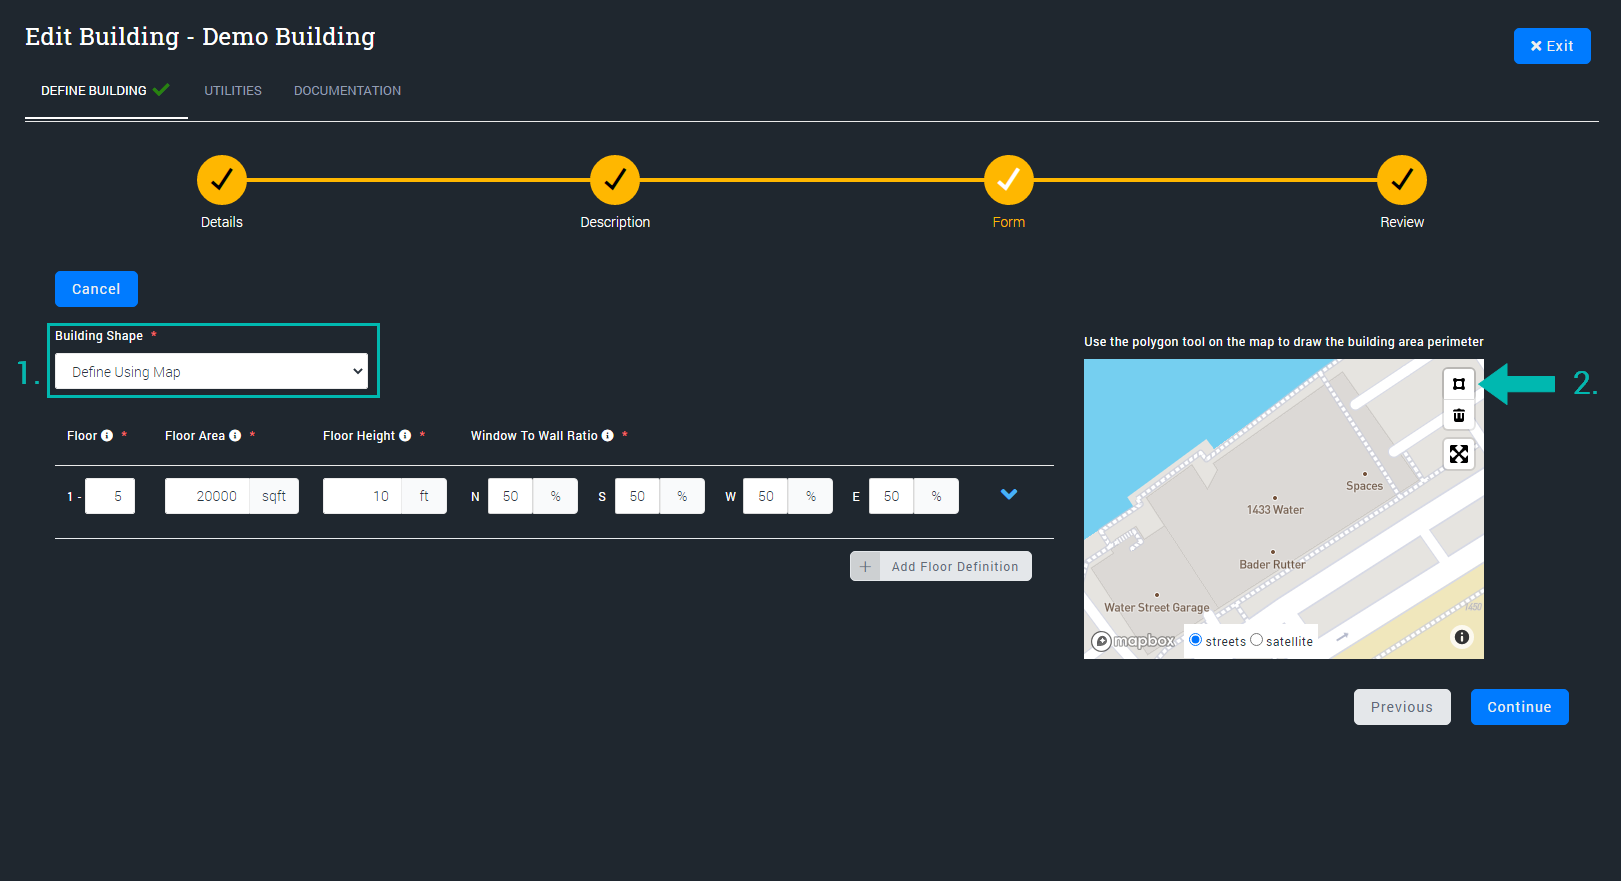
- Next, click on one of the building's outline edges.
- Continue clicking on each vertex point of the building’s outline.
- The polygon shape is completed when the first edge is clicked on again.

Pro Tip: Click the Enter Fullscreen button so the map fills the screen and is easier to click on all the building's edges.
Editing/Deleting
If there is a need to edit or delete a building outline, then follow these steps:
- Click on the centre of the drawn shape.
- Click on the Delete button.
- Now follow the steps as outlined above to redraw the building outline.

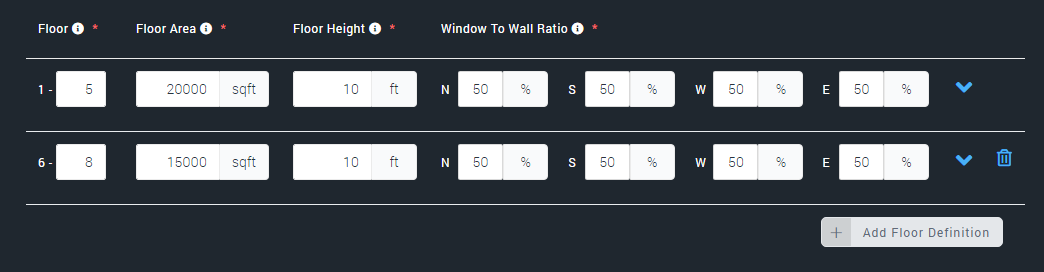
Add Floor Definition
- Click the Add Floor Definition button.
- Specify the floor range with different floor areas.
- Enter the differing characteristics into the relevant fields.

For example, if floors 1 to 5 were 20,000 square feet in size and floors 6 to 8 were 15,000 square feet, then:
Review
Review the basic parameters of the data entered and click the Create Building button to complete the process.

If the process has been successful, a pop-up should appear indicating the building has been successfully created. Utility data can be added at this point or skipped.

Pro Tip: Navigate to Baseline > Baseline Builder > Setup to edit any of the fields above after the building has been added to the system.
Comments
0 comments
Article is closed for comments.